25.9.2019

Updated:

6.5.2021

10 min read

Share on:

In this series, we follow a Christchurch couple in their bid to turn their 1960’s fixer-upper, from a retro rental to a modern home.

If you’ve ever considered buying an older home but have lacked the confidence to tackle something totally outdated, this guide is for you. It’s a whole lot of fun, and not as hard (or anywhere near as risky) as you might imagine.

In the previous chapter, we met electrician Justin, who consulted with Jeremy and Alana to design a functional electrical layout for their renovated home.

With the house gutted, as well as being the time for wiring, it was also the time to hone in the kitchen design details.

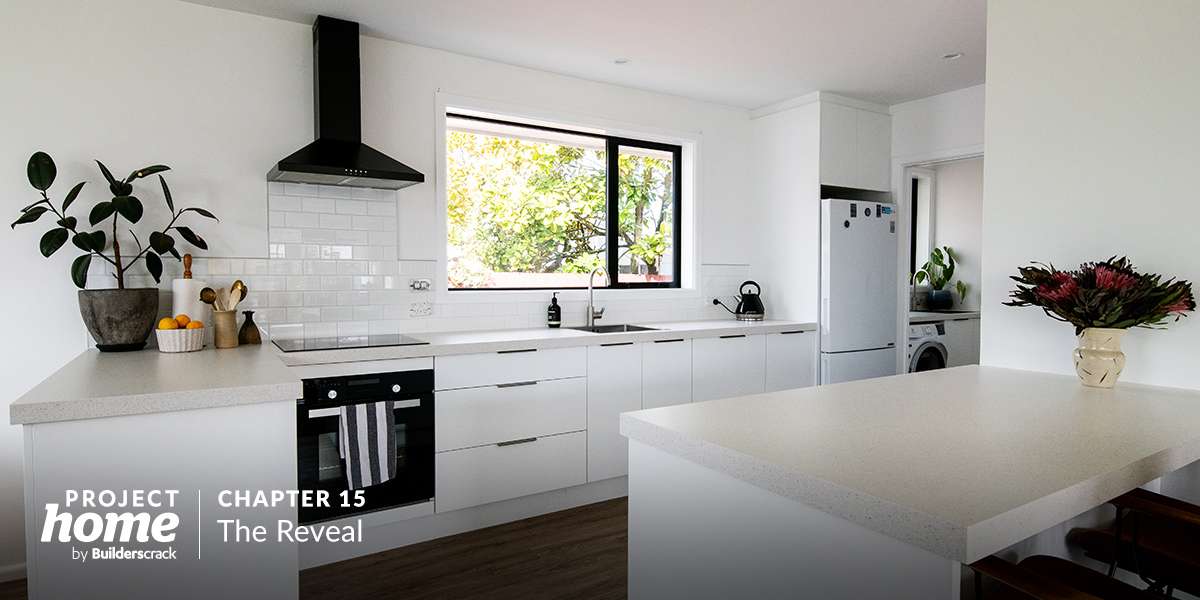
Being keen foodies, and believers in the kitchen being the heart of the home, Jeremy and Alana wanted a clean, open space where food, chatter and energetic cooking expression could freely flow!

What was your vision for the kitchen?

With their home gutted, and the available space ready to be developed into the kitchen of their dreams, Jeremy and Alana had the task of envisioning how that dream kitchen might fit. We discuss inspiration, features and layouts considered.

  • The kitchen represented a huge chunk of the renovation in terms of work and energy. It felt like the renovation hinged on the kitchen in a lot of ways. As discussed right back in chapter 1, we visited a lot of open homes when searching for a home to buy; we checked out a lot of different kitchens through this process and saw a lot of ideas we really liked, and a lot we didn’t.

    We also reflected on the homes we’d spent a lot of time in throughout our lives.

    One of the central themes in our thoughts and memories was the importance of kitchen “flow”. We put this down to the ease at which we could move around the kitchen space, and for that space to feel in the “heart” of the living space.

    We wanted to avoid the kitchen being a secondary space, and the cooking to be a “chore”. The kitchen should instead be the “place to be” in the home. An energetic, central space that drew us in, felt clean, efficient and really functional.

That sounds like a big goal! No one likes doing the dishes right? How did you realise your vision?

With some big expectations on the kitchen design, it was time to begin the process of taking their vision and developing a kitchen layout – as well as considering materials and colours.

  • Ha! We believed if we could achieve our vision, the kitchen space would be really fun and inclusive; dishes wouldn’t be a chore at all!

    One of the really big draws on this house was the basic kitchen space. In the 1960s, kitchen designs weren’t following anything like the same sort of vision we were, but luckily whoever designed this house had allocated a healthy area to the kitchen regardless. We could claim even more space by closing in one of the external doors and claiming that wall and floor area too.

    By adding a cavity slider into the laundry (at the end of the kitchen), and fitting out a second pantry and tinned food larder in the laundry, more floor area and cupboard space could be claimed in the main kitchen area.

    Removing the section of wall between the living space and kitchen would open up the whole space, but as a consequence eliminate valuable wall space. Because we’d claimed space elsewhere already, on balance we’d have enough for appliances and storage.

    One kitchen feature we both had strong feelings about was overhead cupboards above working bench space. We both felt they created a closed in working space, so right from the start this was a no-go. This meant we’d have to be really clever with under-bench and pantry storage, to ensure everything had a place.

  • At this point, our builders had rebalanced available wall and floor space in the kitchen area, and joined the living and kitchen spaces by removing a section of wall.

    The basic wall configuration lent itself to a galley style kitchen. We didn’t really have any preference around kitchen style – we just wanted to make sure the available space was optimally utilised.

    As it turned out, the original sink and oven positions were perfect, given the location of the window. It seemed sensible for the fridge to be positioned right in front of the closed in external door, in the corner against the laundry wall. The main pantry could fit neatly in the corner where a section of the opposite wall remained.

    Our vision included a breakfast bar between the kitchen and living spaces, and a return at the dining end, to add more bench space (and drawers and cupboard space).

    With that in our heads, it was time to engage some kitchen designers and see how they could make our vision and rough design pop!

Did you consider using a flatpack system? How many designers did you engage?

With a clear vision and rough layout in mind, Jeremy and Alana engaged kitchen designers to take their ideas and turn them into something real.

  • We posted our job on Builderscrack, and engaged three kitchen design/makers.

    We considered going the “flat pack” route. We went to the major hardware stores and checked out their offerings. In the end, for what we were looking to create, going this route would have involved quite a bit of compromise, and for a comparable cost to using a local designer/manufacturer.

    We didn’t feel we had the skills to achieve a truly professional installation of a flatpack kitchen, considering we were fitting into a space where not everything was square and plumb. This would have meant engaging a professional installer regardless. For us, for what we wanted to achieve – it didn’t make sense to pay a similar amount for a lot of compromise.

    Once we engaged the three kitchen outfits, their designers came over and consulted with us. We got a good feel for their manufacturing capabilities, hardware (hinges, drawer runners etc) and colour/material options. Each designer measured the available space and sent us their initial design and costing to consider, within about a week.

    It’s worth noting that we already had a great fridge-freezer that we wanted to keep. The designers took this into account, designing a space based on the existing fridge-freezer’s dimensions.

Who did you choose and why?

With three kitchen designers/makers engaged, the consultation complete and initial layout plans and costings in hand – it was time to choose who they’d work with to refine the design and move forward with the manufacture.

  • Glen Kelman from Install Concepts (now named Kitchen Concepts) made a really positive impression on us with not just his creative skills, but his ability to listen to our dream and vision, and turn that into a design that really excited us.

    It’s hard to describe the excitement we felt when we received the full 3D computer concepts! Our kitchen, there on paper in 3D for us to really get a good feel of. That process allowed us to identify elements for tweaking and refinement, and it took a few iterations before we felt it was perfect. Glen was only too happy to guide us through that process and tweak and refine the design.

    Glen picked up on the laundry early on and suggested he do a design to compliment the kitchen. At that stage, we hadn’t properly thought about the laundry and it was in a bit of a state due to the hot water cylinder relocation. The initial design he did was really impressive, and we couldn’t say no.

    We visited Glen and Aimee at Kitchen Concepts’ showroom to discuss and select materials, colours and appliances. We settled on a relatively inexpensive but high-quality laminate benchtop; white with a fine speckle. The kitchen doors, drawers etc would be flat white, with black oven, cooktop and range hood. The dishwasher would be “hidden” behind a seamless panel. Sink, faucet and all handles would be brushed stainless. The look we wanted to create would be right in line with our renovation “mission statement”, i.e. clean, modern, timeless and functional.

    Kitchen Concepts used high quality Austrian blum hardware as standard, which meant soft closing cupboards and drawers.

Tell us a bit about the laundry

This totally under-rated room was getting a much needed makeover too. Jeremy and Alana envisioned it as an extension of the kitchen in some ways, as well as a place to efficiently manage washing. But it was Glen who brought the ideas for how to really make the space pop.

  • We haven’t talked a lot about the laundry, but for us, it was kind of a big deal too. At the time of kitchen design, it had been relegated to the bottom of the pile. When Glen had a look at it, his suggestions made total sense.

    We had moved the hot water cylinder into a cupboard between the laundry and hallway, but it didn’t quite fit, so protruded about 200mm into the laundry, as well as a large section of wall having been removed to accomodate it. As an elegant fix, we’d install a shallow tinned food larder in front of the hot water cylinder, as well as a deeper pantry next to it. The doors of both would be at the same depth.

    On the other side, a front loading washing machine would sit under a benchtop of the same style, height and depth as the benchtop in the kitchen. An identical sink and faucet would be installed into the benchtop. Below that would be a cupboard for cleaning products.

    Sticking with their design vision of “no overhead cupboards”, the window would be the only feature of the wall, giving a spacious feel to the laundry space.

    It was uncomplicated, in line with our mission statement, and would be a fantastic asset to the kitchen space.

What was the process from here?

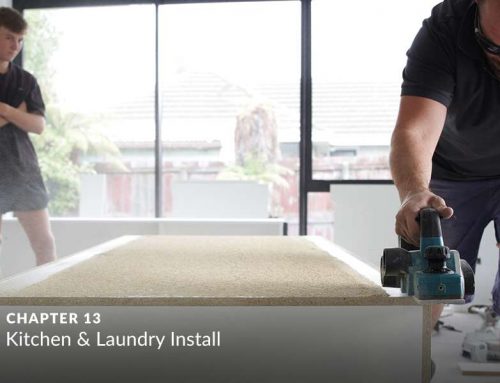
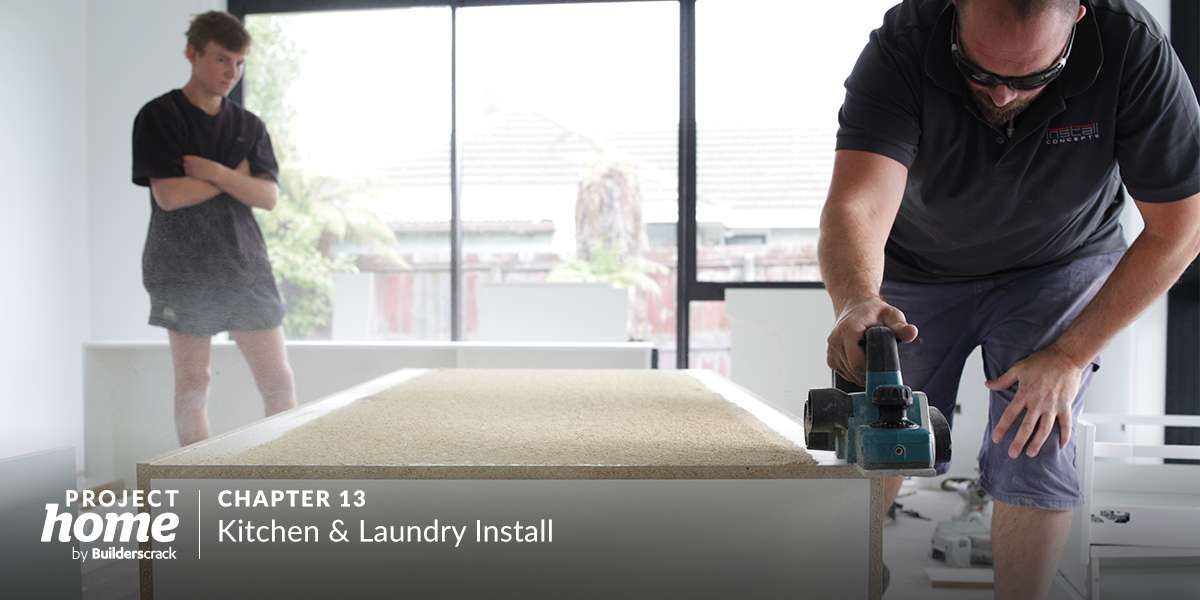
Jeremy and Alana were working with Kitchen Concepts to build their dream kitchen (and laundry). The measurements had been taken, the details specified and it was ready to move forward with the manufacture.

  • From here, various specialists would be involved from Kitchen Concepts to do a final measure before the plans would be confirmed and manufacture could begin.

    The final measure was an exciting process in itself. With tape measure in hand, Rodney, Kitchen Concept’s expert kitchen planner set to work intricately measuring every dimension of the kitchen, laundry and dining spaces. Glen and ourselves were on hand to hone in specific final positions of details like the breakfast bar and return, and have input into the way certain junctions would be detailed, like the way the breakfast bar met the pantry. It was a really enjoyable session.

    Final plans were again sent through for signoff, and a deposit paid to begin manufacture.

    Manufacture would take 3 weeks, and the install would be booked for a date less than a month away from the final measure!

    The install was a specialised process in itself. We would need to ensure the kitchen space was completely ready; gibbed, plastered and painted, before the install could be undertaken.

    The installers would need to shave and shape the kitchen to fit the imperfect walls and floor. The result, a seamlessly installed kitchen and laundry – joinery perfection! But in the meantime, there was brickwork, building, plastering and painting to be done.

Lessons learned from the day

  • Invest time in reflecting on your dream kitchen’s feel and features. Visiting open homes is a great way to find inspiration you can touch and interact with.

  • Your kitchen style will be dictated by the shape and size of the space available. Discuss “rebalancing” space with your builder and kitchen designer to maximise usable wall and floor area.

  • While flat-pack kitchens are great for certain applications, don’t write off local design/manufacturers. It is likely the price is quite comparable when taking into account installation.

  • Different designers generally specialise in different pricing brackets. Discuss budget upfront when talking with different outfits and make sure they’re a good fit for your job.

  • When engaging a designer, it should be an exciting, inspirational, creative experience. Let them know your needs and any features that are really important to you. Ultimately, they are trying to bring your vision to life – so don’t be afraid to share everything you’re looking for, even if it’s not well thought out.

  • The final measure is a critical stage of the kitchen planning. It’s a really good idea to be available. Ask the measurer to make markings on the floor, where particular cupboards will sit if you’re not completely sure how everything will fit, and don’t be afraid to make adjustments.

Gallery (click to enlarge)

Keep reading: