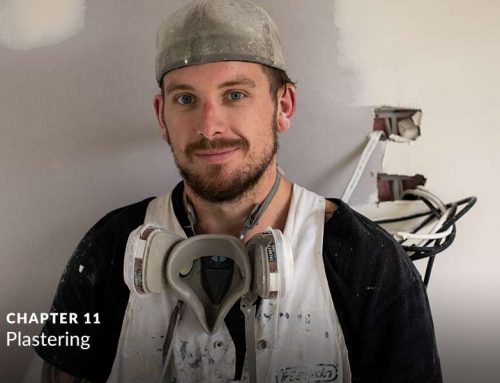
18.9.2019

Updated:

6.5.2021

7 min read

Share on:

In this series, we follow a Christchurch couple in their bid to turn their 1960’s fixer-upper, from a retro rental to a modern home.

If you’ve ever considered buying an older home but have lacked the confidence to tackle something totally outdated, this guide is for you. It’s a whole lot of fun, and not as hard (or anywhere near as risky) as you might imagine.

In the previous chapter, we looked at how Jeremy and Alana worked with their plumber to replace their home’s hot water cylinder and upgrade the plumbing.

With the gib off, and easy access to all framing floor to ceiling, it was time to get into the heavy lifting on the electrical front.

Luckily their home had modern 3 core wiring, being built around the time the standards changed. This meant the existing wiring was fit for purpose, but there was still lots of work to do!

What was the scope of the electrician’s role? What needed doing?

With their home having being built with modern-standards-compliant wiring, this didn’t need replacing. But there was still a lot of electrical work needing to be done. We go through it piece by piece.

  • We made contact with Justin from JWB Electrical very early on in the project. For our project anyway, Justin would be limited to what he could do by the progress of the other trades at various times.

    This meant Justin was around three times to do different chunks of work. It looked something like this, by visit:

    1. Make the site electrically safe, install site-power-box and discuss an overall plan with builders, and remove wall mounted electrical items and unused wiring:
      1. Bathroom heater
      2. Towel rail
      3. Associated old hot water cylinder wiring
    2. Visit with all gib off walls to run new wiring for:
      1. Sockets
      2. New kitchen appliances
      3. New hot water cylinder
      4. Home entertainment (HDMI etc)
      5. New lighting
    3. After plastering and painting, return to install and hook up all electrical items:
      1. Sockets
      2. Install new light fittings and switches
      3. New appliances
      4. Reinstall and hook back up wall mounted bathroom items
      5. New hot water cylinder
      6. Home entertainment

    So there were a total of three main visits, each one based around where the other trades were at.

    On Justin’s first visit discussed in chapter 4, he took us through the above steps and made a plan with the builders around the rough timing of the visits and what could be achieved. He also took the opportunity to remove a couple of wall-mounted bathroom electrical items and disconnect the old hot water cylinder.

What decisions and planning needed to be made regarding wiring changes?

With the gib off the walls, the existing wiring exposed and the house ready to be wired for any new electrical additions, it was time to ensure the electrical plan was sound. Jeremy and Alana consulted with their electrician Justin to hone in the details.

  • It felt like there were a lot of critical electrical-related decisions to be made!

    We couldn’t have achieved the result we did without the expertise of Justin from JWB. We shared quite a few ideas on where sockets would be useful – but this was just the beginning.

    We hadn’t deeply considered lighting and light switches in the overall renovation plan, but we appreciated how important it was for really enhancing the living space we were creating.

    Justin talked us through best practices so far as switch positioning, depending on the flow of movement through the living space. As there were multiple points of entry and exit into the kitchen and living area, we discussed what lights should be switched from where.

    So far as ceiling lights went, Justin recommended we go for flush-mount LEDs. They were relatively inexpensive, dimmable and emitted a tone that was kind on the eye. Justin sketched up a blueprint based on our discussions and that was job done!

    We would compliment the ceiling lighting with some softer lamps, which would be plugged into low-mounted wall sockets. Alana was particulary keen on adding several new sockets around the living area. Justin marked directly on the studs, where the new sockets were to be positioned.

    The rest of the new wiring was dependent on previous decisions like where the hot water cylinder, and where kitchen appliances were to be positioned.

    It’s important to note that we had already measured up and made a rough layout plan for our new kitchen. This was something that we’d worked on before Justin made his second visit and will be covered in a future chapter.

    Thus, the positioning for sockets for the dishwasher, fridge and microwave were all known. Additional sockets for other benchtop kitchen appliances were to be added too, based around bench locations.

    Justin recommended we upgrade several components on our main switchboard to meet modern standards. This included installing an RCD and upgrading wired fuses to breakers for some circuits.

    Finally, Justin suggested that he check the existing wiring that he could access, including light fittings, sockets and switches. We were keen for the piece of mind that would come with a full check over so agreed.

How did Justin approach and carry out the work?

With all the details discussed and recorded, it was time for Justin to get to work. The biggest task was running the wiring from the main switchboard to every light switch, light fitting and socket.

  • The process of wiring up a house is governed and set as part of Standards NZ. In fact, the majority of trade tasks are covered by Standards NZ, or manufacturers specifications; and in many cases, both.

    The Electrical Workers Registration Board is a Government run entity that manages the registration information of electrical workers. Every electrical worker is required to maintain a registration class and is only permitted to undertake work according to that class.

    Who is able to undertake electrical work, and the scope of the electrical work they are allowed to undertake is strictly governed.

    Only registered and licenced electrical workers of an appropriate class are able to complete an Electrical Certificate of Compliance and Electrical Safety Certificate. This certificate is issued to the client on completion of electrical work and assures the client that the work has been completed to all required standards.

    With respect to the work Justin was to carry out, after the planning stage, he just got into it and installed everything as is set out in the standards. It took him a couple of days to wire up all the additional sockets, lighting and new switches.

    We were totally confident in Justin’s skills and approach. His competence was demonstrated across his entire work ethic; everything was neat and tidy!

After the wiring was done, what was next?

With the house wired, the sockets and light switches weren’t actually connected and attached, but everything was ready for the final visit.

  • After the house was wired for all the new electrical components, Justin’s job was done for the time being.

    Not until the kitchen was fitted, and all the plastering and painting completed would Justin return to hook everything up. In fact, Justin’s final visit would be the second to last job requiring to be done, before flooring and carpet.

    So there was a lot of work to be done between the second and final visits.

    We’ll cover the final visit later in this series, but for now – it was time to continue with the building work, and focus back on the outside of the house, where the brickwork was ready to be patched up by our brickies!

Lessons learned from the day

  • A good electrician will be happy to consult on lighting, switch and socket layout, and will be able to suggest some clever options for home entertainment mounting etc.

  • Your electrician will likely need to make two or more visits on even small renovations. The builder and electrician need to work closely together to optimise timing.

  • Depending on the scope of your renovation, you may want to visit specialist lighting retailers to hone in exactly the result you’re after. In many cases, you can work directly with your electrician to achieve great results.

  • When the gib is off the walls is the best opportunity you’ll have to reconfigure your electrical configuration. Afterthoughts can be expensive, so make sure you take a little extra time to nail your plan at the beginning.

  • Your electrician must be registered with the Electrical Workers Registration Board, and you should be confident at all times in their work and ability. If you have any doubts, there are tools available for checking their status at https://www.ewrb.govt.nz/
  • Upon completion of any electrical work, you will be presented with a Electrical Certificate of Compliance. This certifies your work was carried out to standard, by a qualified worker.

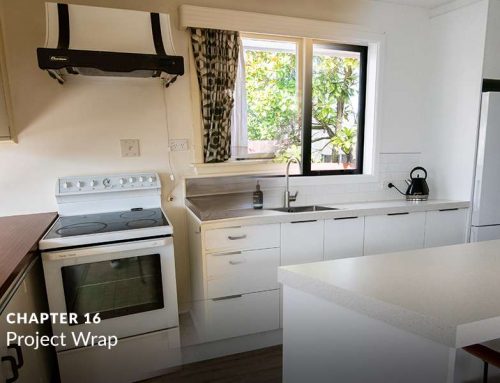
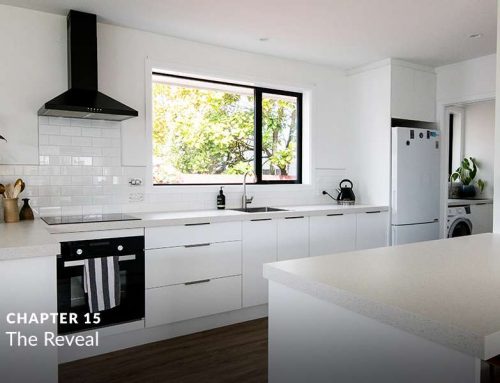
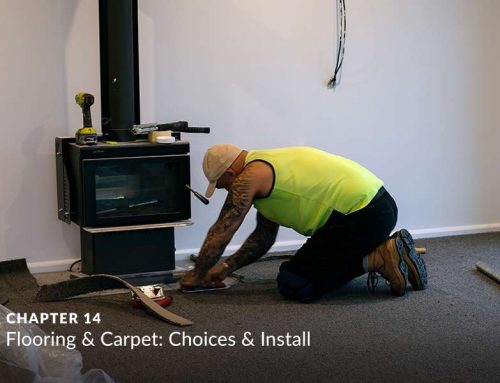
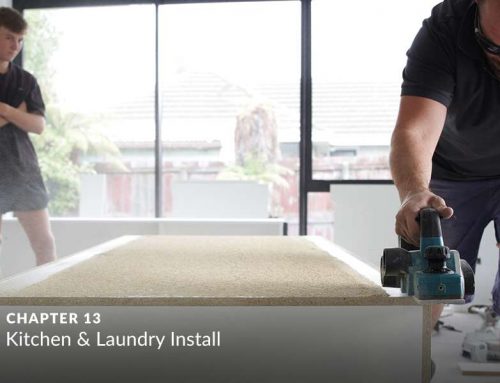
Gallery (click to enlarge)

Keep reading: