3.9.2019

Updated:

6.5.2021

7 min read

Share on:

In this series, we follow a Christchurch couple in their bid to turn their 1960’s fixer-upper, from a retro rental to a modern home.

If you’ve ever considered buying an older home but have lacked the confidence to tackle something totally outdated, this guide is for you. It’s a whole lot of fun, and not as hard (or anywhere near as risky) as you might imagine.

In the previous chapter, we explored the detailed plan and looked at a typical first day of a renovation.

Now the the job-by-job plan was fleshed out, the house was electrically safe, and the demo was underway – it was time for the milimeter accurate glazing measure up.

There are a few ways to approach measuring up for double glazing. Jeremy and Alana with their builder, Mark, opted for a conservative approach. Removing all architraves (or mouldings) around the windows, and in some cases removing the windows themselves would ensure a perfect fit of the new units.

Let’s start at the beginning. What were you looking to achieve with your glazing upgrade?

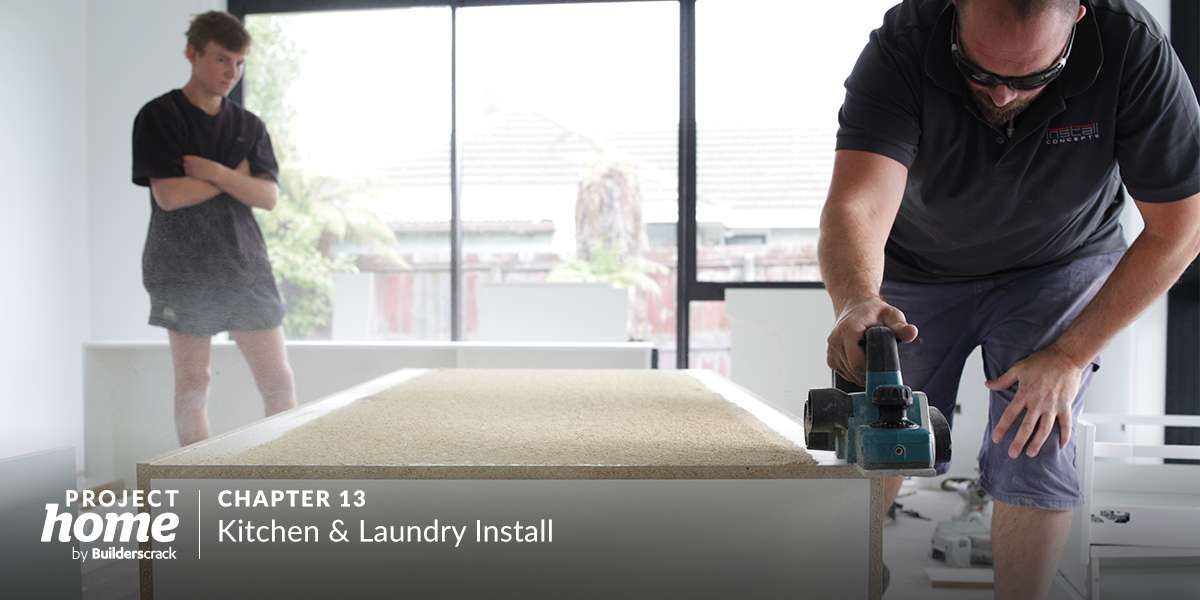
As part of their renovation, Jeremy and Alana will be completely replacing all of the original single glazed timber joinery with aluminium double glazing.

  • We had read a lot about the benefits of double glazing in both thermally insulating and noise reduction contexts. We initially felt that upgrading the glazing was good value for money considering our house already had underfloor and ceiling insulation installed, and we would be installing wall insulation in the living area.

    Once we began to research this space more, we discovered there were many options so far as solutions and technologies:

    • Retrofit double glazing to the timber joinery
    • Replace the timber joinery with another material, and double glazing
    • Glazing options: Low-e, soundproof, argon filled, triple glazing and many more options

    Generally speaking, the more insulative the solution was, the more expensive it was.

    The following chart gives an overview of some popular combinations of glazing and joinery materials. IGU stands for Insulated Glass Unit, and represents the glazing component. R-value is a measure of a material’s thermally insulative properties.

Window frame material Single glazing IGU with 4 mm glass and 8 mm air space IGU with 4 mm glass and 12 mm air space IGU with 4 mm glass, 12 mm air space and low-e pane IGU with 4 mm glass, 12 mm air space, low-e pane and argon gas fill
Aluminium R0.15 R0.25 R0.26 R0.31 R0.32
Thermally broken aluminium R0.17 R0.30 R0.31 R0.39 R0.41
Timber R0.19 R0.34 R0.36 R0.47 R0.51
uPVC R0.19 R0.34 R0.36 R0.47 R0.51
  • One thing this chart doesn’t detail is the quality of seal around opening windows and doors. In our house, many of the opening timber windows didn’t sit perfectly against the frame. Resulting in draughty windows, reducing the R-value of the joinery less than what is shown here.

    As our house stood, the timber single glazed windows were draughty, poorly insulating and very bad at reducing outside noise.

    Because we were equally interested in reducing noise, as we were in improving the insulative value of our glazing, this ruled out using a retro-fit solution. We felt the existing timber joinery was just not up to the task, regardless of whether the glazing was upgraded or not.

    Once this was decided, and we knew we were replacing the joinery as well as the glazing, we began talking to various manufacturers. We did a rough measure up and sent through the dimensions of all the windows and doors we’d be replacing to get rough estimates.

    The range of different solutions and prices on offer was quite overwhelming. In the end, it came down to a pretty simple challenge. We needed to find the right balance between price, thermal insulation and acoustic insulation.

What joinery and glazing did you opt for and why?

After a process of researching different glazing and joinery options, Jeremy and Alana measured up their windows and sent off their measurements to various manufacturers. They received quotes back, and were ready to decide on a solution.

  • We opted for simple but effective standard aluminium joinery, and a range of different glazing IGUs depending on the room. Low-e for the living area, and laminated, sound reduction IGUs for the bedrooms.

    We went with Rockford Aluminium, a local manufacturer of Fairview windows and doors.

    The pricing on this type of joinery was within a tight range, with no outliers.

    Rockford’s showroom allowed us to have a good look and feel of the joinery they made. We liked it’s aesthetic. It felt robust, and the square edges, clean lines and strong appearance would really suit the look we were going for. By opting for a striking black finish, the joinery would be a strong feature of the finished renovation, rather than something meant to fade into the background.

    All up, we were looking at around $20,000 for the full house lot including two large triple stackers, 10 windows and a front door. This made up around a quarter of our renovation budget, but we felt that with the quality of living environment we’d achieve, it was well worth it.

How did the window maker work with the builder to get the right fit?

Now that Jeremy and Alana had settled on a glazing and joinery solution, and found a manufacturer – they needed the window maker and the builder to work together to ensure everything was a perfect fit.

  • The windows had a two week lead time on manufacture. We wanted to get it underway as soon as possible as to avoid delays down the track.

    On the second day of the renovation, Bruce, from Rockford Aluminium arrived on-site to work with Mark to measure up every window and door. This required the removal of architraves, and in some cases the complete removal of difficult to measure windows. Mark and Bruce worked together to establish all the details of the, replacements including any flashings required.

    This process was diligent, and guaranteed the best fit possible.

What was the process from there?

All window and door openings had been measured, and the manufacture was now underway, with a two week turnaround.

  • Rockford needed a deposit before getting the order underway, which is standard practice. From there, Rockford would order the aluminium extrusions, which is the raw lengths of aluminium used to make the joinery. The raw lengths of aluminium extrusion would be cut and assembled in Rockfords local factory, into our windows and doors.

    They would also take care of the manufacture of the custom insulated glass units, specific to our requirements, and assemble them into the final, ready to install product.

    In two weeks, the completed windows would arrive on-site, and be fitted by our builder. Most of the old windows would stay in place until then, to avoid having to cover everything up with plywood in the meantime. For any windows that had been removed, Mark would cover with plywood for the meantime.

Lessons learned from the day

  • There are a lot of competing offerings in the joinery and glazing space. Make sure you’re choosing a solution that balances your cost and insulation needs.

  • Acoustic insulation is something that you should discuss with the different companies you consult with. There is a wide variation in the effectiveness of different products.

  • Generally speaking, the more insulative the solution, the more costly. Make sure you’re investing wisely by taking care of cheaper to solve issues like underfloor and ceiling insulation, and any moisture issues first.

  • Ask your builder to work with your window manufacturer to get the best measurements possible. This will require some upfront investment of the builders time, but can save hours down the track, and prevent mismeasurements, which can cause delays and extra cost.

  • Invest in glazing technologies like Low-E and laminated acoustic glass in specific rooms, depending on their sun orientation and purpose. These technologies are marginally more expensive, but give big improvements over standard glass.

Gallery (click to enlarge)

Keeping reading: