
Updated:
24.4.2026
T here’s a point every autumn where, almost overnight, it stops feeling like summer and starts feeling like winter. And often you feel it in the home first. A draught around a window frame. Condensation on the glass in the morning. A room that never quite warms up, no matter what you do.
That’s usually the sign that winter prep needs to go beyond the basics. We’ve broken down six parts of a Kiwi home that have the biggest impact on keeping it warm and dry this winter, from the roof above you, to the paint on the outside walls, and how to get on top of each one.

We’ve broken down six parts of a Kiwi home that have the biggest impact on keeping it warm and dry this winter.
Is your roof ready for winter: Gutters and flashings
By autumn, gutters are full. Leaves, debris and summer build-up settle in over the warmer months, and water that can’t flow freely backs up, spills over and sits against your fascia boards and foundations, often for months without any obvious sign inside the house. Clear them out and check that downpipes are running freely and discharging well away from the house.
Gutter guards
If you’re dealing with significant tree coverage, gutter guards are worth considering. They reduce how often you need to clear debris and lower the risk of major blockages, but they’re not a set-and-forget solution. Fine debris can still build up on top of and underneath the guards, so gutters should still be inspected at least once a year, even with guards in place.
Flashings
While you’re thinking about the roof, check your flashings, the metal strips that seal the joins around chimneys, skylights, and where the roof meets a wall. Flashings are one of the most overlooked parts of any roof and one of the most common sources of water ingress. Over time, sealant dries out and cracks, and metal can lift slightly. Enough to let water in during heavy rain without ever showing up as an obvious leak inside.
How often should you get an inspection?
For most homes, a professional inspection once a year is enough to stay on top of it. If you’re in a leafy suburb, near the coast, or somewhere that gets significant storms, every six months is worth it. After any major weather event, it’s always worth getting someone up there. A quick check can catch cracked tiles, loose ridge capping or lifting flashings before they turn into something much more expensive to fix.
For a more detailed guide on gutters and spouting, including warning signs, water ingress and when to call a professional, read our guide: Guttering and Spouting: How to Spot the Warning Signs and Prevent Damage.

By autumn, gutters are often full of leaves, debris, and summer build-up.
What’s getting in through your walls: Cladding gaps
On a windy day, run your hand slowly along your window and door frames. If you can feel a chill coming through, that’s often a sign cold air is getting in, and where draughts get in, moisture can follow.
Gaps and cracks in cladding are one of the most overlooked ways a home loses warmth and lets in damage over winter. Once moisture gets into wall cavities, it creates the conditions for mould, rot and structural damage that can cost far more to fix than the gap itself.
Walk around the outside of your home and check where different materials meet. Here’s what to look for:
- Gaps or cracking paint where different materials meet — around window and door frames, along the base of the cladding, at exterior joints and corners
- Sealant that has dried out and pulled away from frames or joins
- Crumbling or cracked mortar joints on brick homes — it’s easy to miss because the bricks themselves still look fine
Small gaps and dried-out sealant can often be repaired with a quality exterior sealant. Anything more serious, lifted or damaged boards, cracking around joinery, or signs of a weathertightness issue, should be assessed by a professional before winter sets in.

Gaps and cracks in cladding are one of the most often overlooked ways a home loses warmth.
Where the heat goes, and how to keep more of it
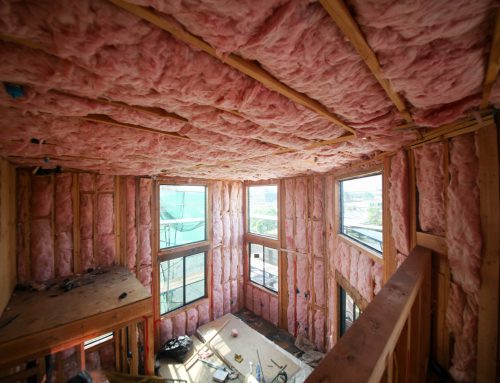
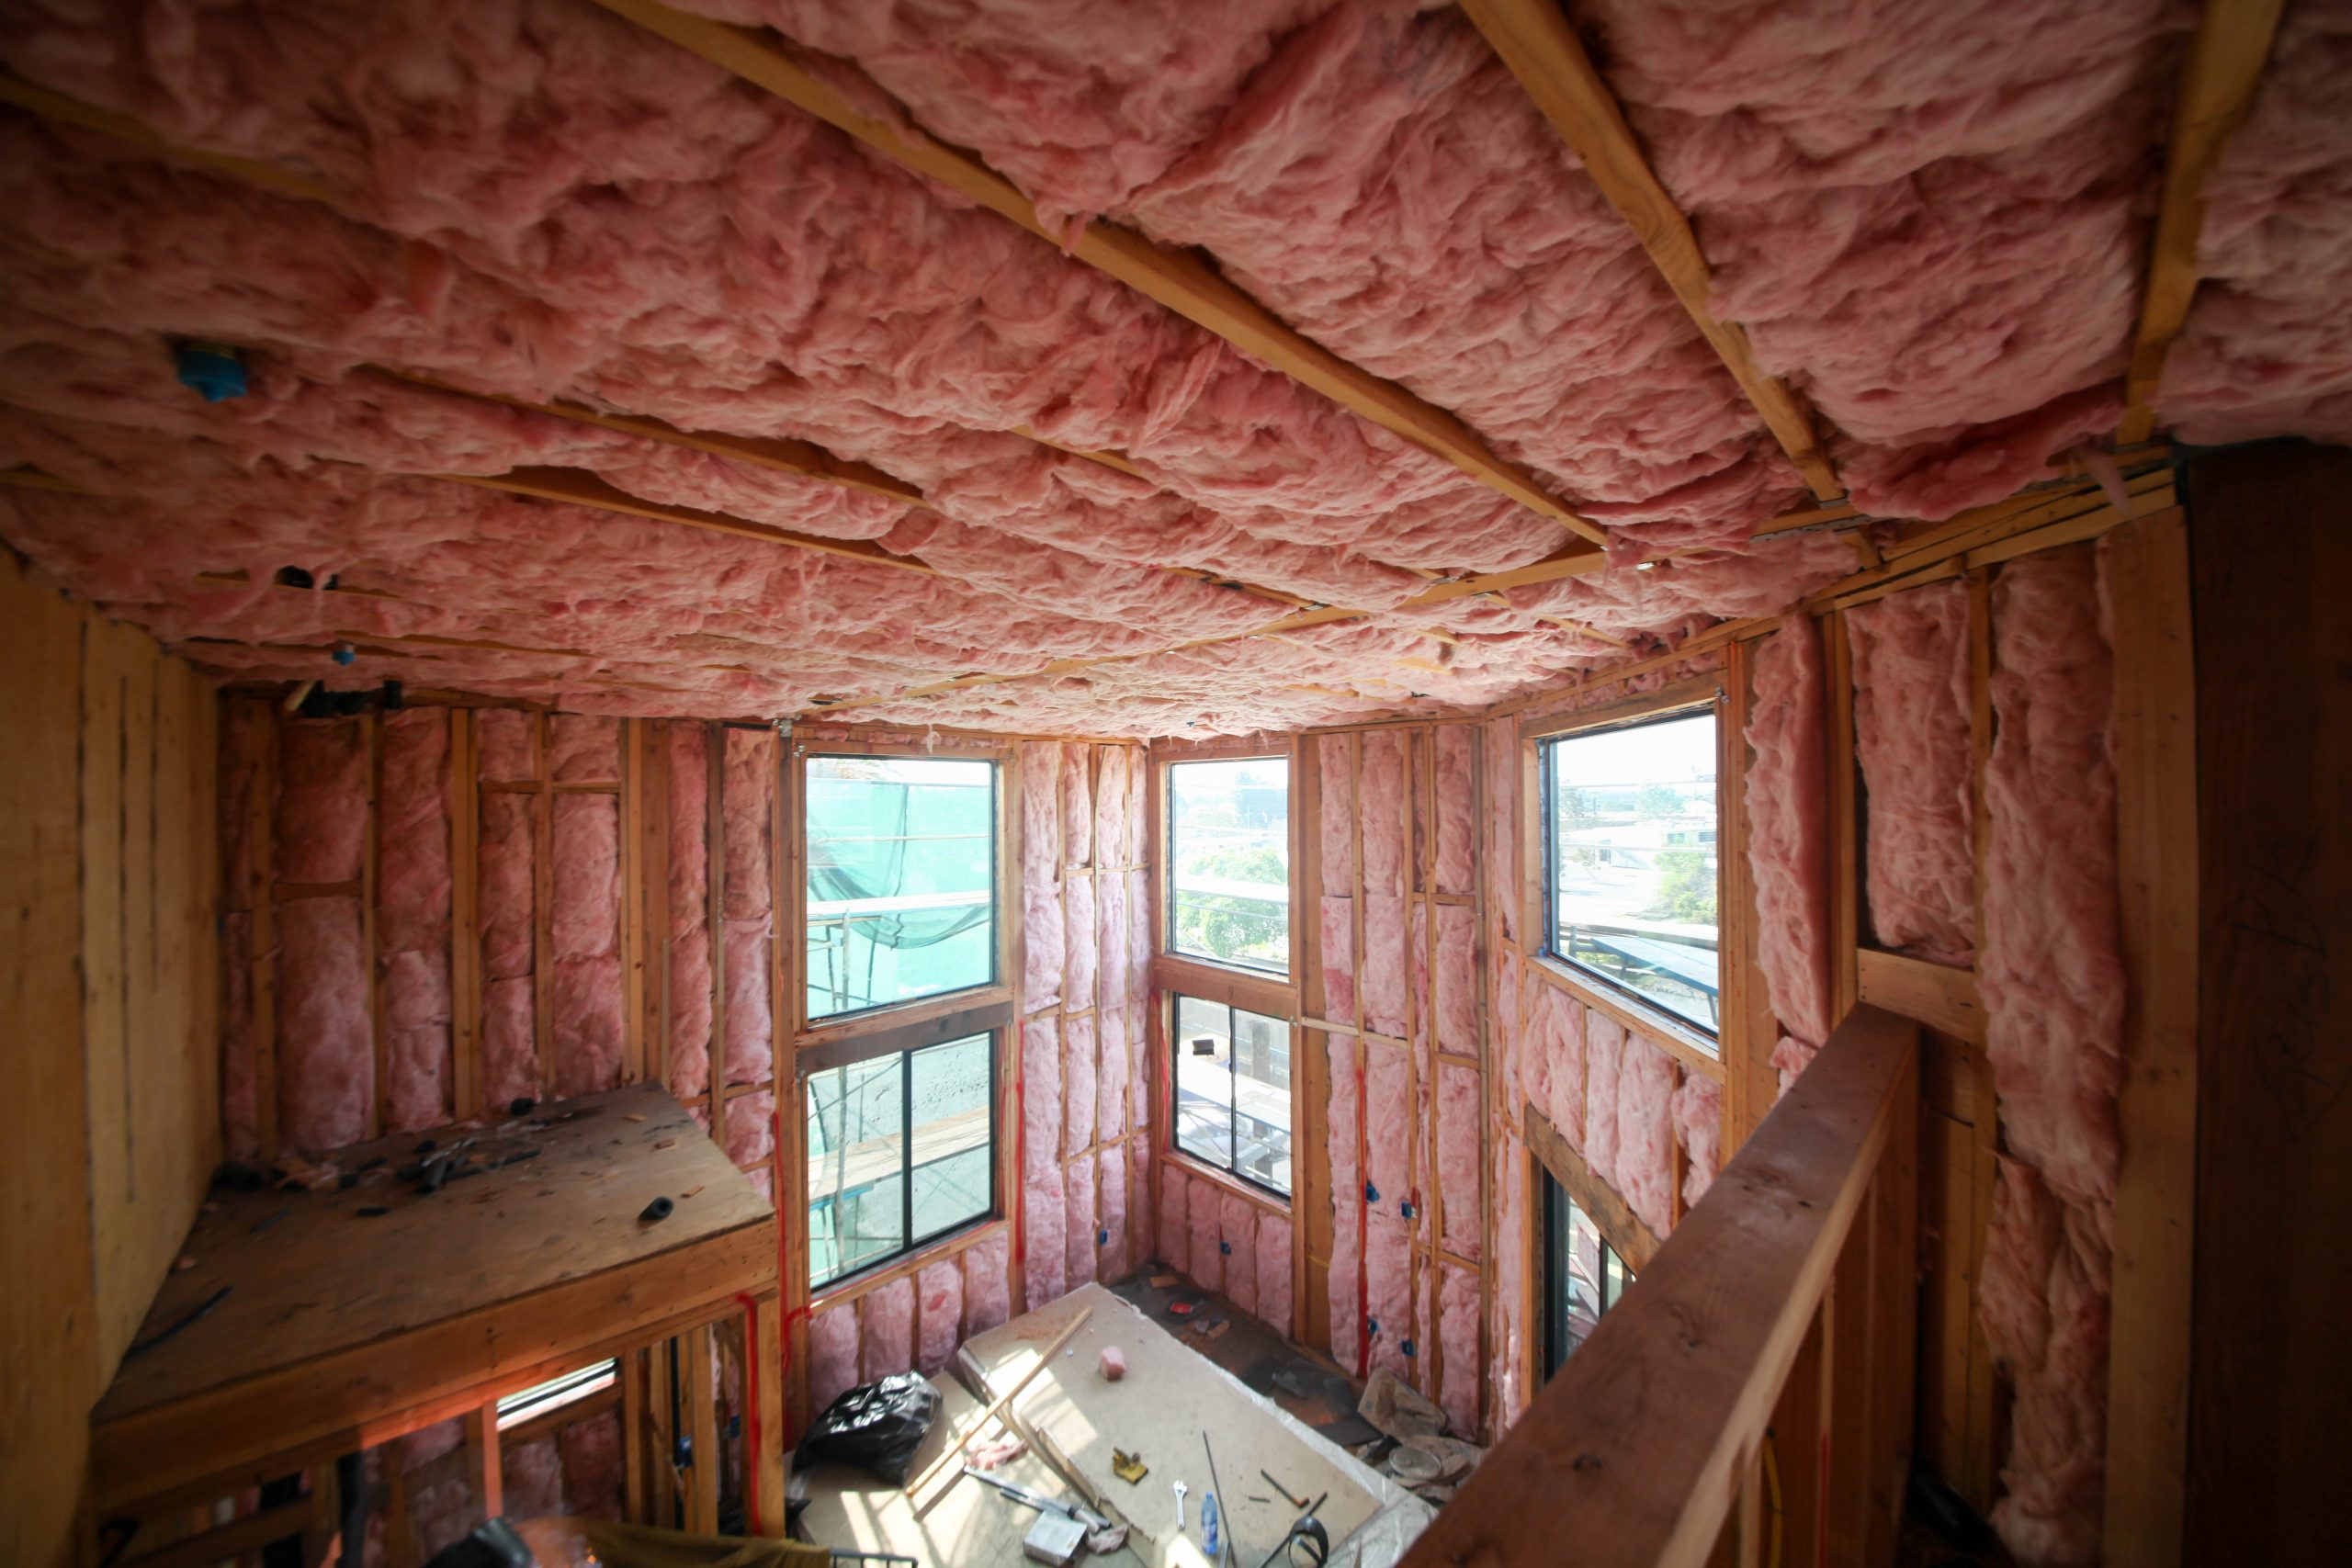
Before you spend anything on heating, it’s worth asking how much warmth your home is actually holding onto. A significant amount of heat is lost through uninsulated ceilings and floors, which means over half of what you’re paying to heat your home can simply disappear if those areas aren’t sorted.
Underfloor Insulation
Underfloor insulation is one of the first things to check, and often one of the least visited parts of most homes. If you have a subfloor space, it’s worth having someone check that batts are still in place, haven’t sagged away from the floor, and aren’t showing signs of moisture damage. Even partial sagging can reduce insulation performance. In ceiling spaces, check for gaps around light fittings, hatches, or penetrations, because these are the spots where heat quietly escapes all winter.
Draught-stopping and curtains
Door draught excluders, foam tape around window frames and blocking gaps at skirting boards all make a genuine difference in older homes. Curtains are underrated. Floor-length thermal-lined curtains that cover the full window frame can make a big difference for a fraction of the cost, and they’re a much easier place to start than double glazing.
If double glazing is on your radar, it’s a worthwhile long-term investment, but get a glazier to assess your home first because the performance difference varies a lot depending on your existing joinery.
A few things are easy to overlook:
- Lay rugs on bare floors to reduce heat loss through cold floors
- Use your ceiling fan on a low reverse setting to push the warm air that pools near the ceiling back down into the room
- Move beds or sofas away from external walls, which are usually the coldest in the house
The sign you have an insulation problem rather than a heating one is simple: some rooms stay stubbornly cold no matter what the thermostat says.

A significant amount of heat is lost through uninsulated ceilings and floors.
Getting your heating ready: Heat pumps
Heat pumps do a lot of the heavy lifting in New Zealand homes over winter, but they’re also something people often forget about until the first genuinely cold night, when they switch one on and notice it’s not performing the way it used to.
Filters should be cleaned roughly every three months, more often if you have pets or a dusty environment. Remove the filter panel, rinse the filters, and let them dry fully before refitting. A blocked filter is one of the most common reasons a heat pump underperforms, and it’s entirely avoidable. If your unit hasn’t been professionally serviced in a while, early autumn is a good time to book it in. If your home uses gas heating, an annual check from a licensed gasfitter is also worth booking before winter.
It’s also worth thinking about where your heat pump sits relative to your furniture. A sofa or bookcase blocking the unit means it’s working much harder than it needs to. Clear the area in front of it and, where possible, close off rooms you’re not using.

Heat pumps do a lot of the heavy lifting in New Zealand homes over winter.
Why your windows are weeping: Condensation
Condensation is one of the most misunderstood winter problems in Kiwi homes. Weeping windows and damp patches on walls aren’t just annoying; they’re a sign that moisture levels inside your home are too high, which leads to mould on surfaces, in wall cavities, and on clothing stored in poorly ventilated spaces.
The fix isn’t just wiping down the glass each morning, though squeegeeing windows and sills does help stop moisture sitting and soaking in. The real solution is reducing the moisture you’re generating inside your home in the first place.
The biggest culprits are easy to address:
- Dry clothes outside on fine days rather than on indoor racks, because a rack of wet laundry releases a surprising amount of moisture into the air
- Cover pots when cooking and run your rangehood
- Shower with the bathroom fan on and leave it running for ten minutes after you finish
- Keep windows slightly cracked in high-use rooms by using secure window stays or restrictors
A dehumidifier is one of the most effective tools for managing indoor moisture, particularly in bedrooms and living areas. Many heat pumps also have a dry mode, which is worth using on damp days when you don’t need much heat.
If you’re seeing mould on walls or ceilings despite managing moisture carefully, that can point to an underlying insulation or ventilation issue rather than just lifestyle habits, so it’s worth getting a professional to take a look.
On dry, still days, open windows for 20 to 30 minutes to flush out the humid air that builds up inside over winter. It costs nothing and makes a real difference to how fresh your home feels.

Weeping windows and damp patches on walls are a sign that moisture levels inside your home are too high.
When peeling paint is more than cosmetic: Exterior painting before winter
Peeling or cracking exterior paint isn’t just a cosmetic issue, it’s a sign your cladding may no longer be properly sealed. Once paint fails, moisture can get into timber and start causing rot. Over a New Zealand winter, that process can move quickly.
Walk around your home and look for bubbling, peeling or cracking paint, particularly on south-facing walls that get less sun and more moisture exposure, and on timber joinery around windows and doors, which often fail first. If the damage is isolated, a painter can often cut it back and repaint the affected areas rather than repainting the whole house. It’s worth getting a quote before assuming the worst.
Bear in mind that exterior paint needs dry conditions to apply and cure properly, which is another reason not to leave this one too late in the season.
For a deeper look at why paint fails and how to fix it properly, read our guide: Why Paint Peels, Flakes and Bubbles, and How to Repaint It Properly.

Discover our Project Story: With winter approaching, this classic Kiwi home gets a fresh lick of paint to seal weatherboards against a wet season ahead.
The bottom line
Winter has a habit of exposing the weak spots in a house: the loose flashing, the failed seal, the underperforming heat pump, the bit of cladding that’s been fine until it gets wet for weeks on end. Catch them early and they stay small; leave them too long and they become expensive. Autumn is the best time to get ahead of the cold, the damp, and the repairs.
If you’ve spotted something that needs attention, post your job on Builderscrack and we’ll connect you with a verified tradie. If you’re still weighing up what to tackle first, our cost estimator is a good place to start.


