Updated:
2.2.2026
W
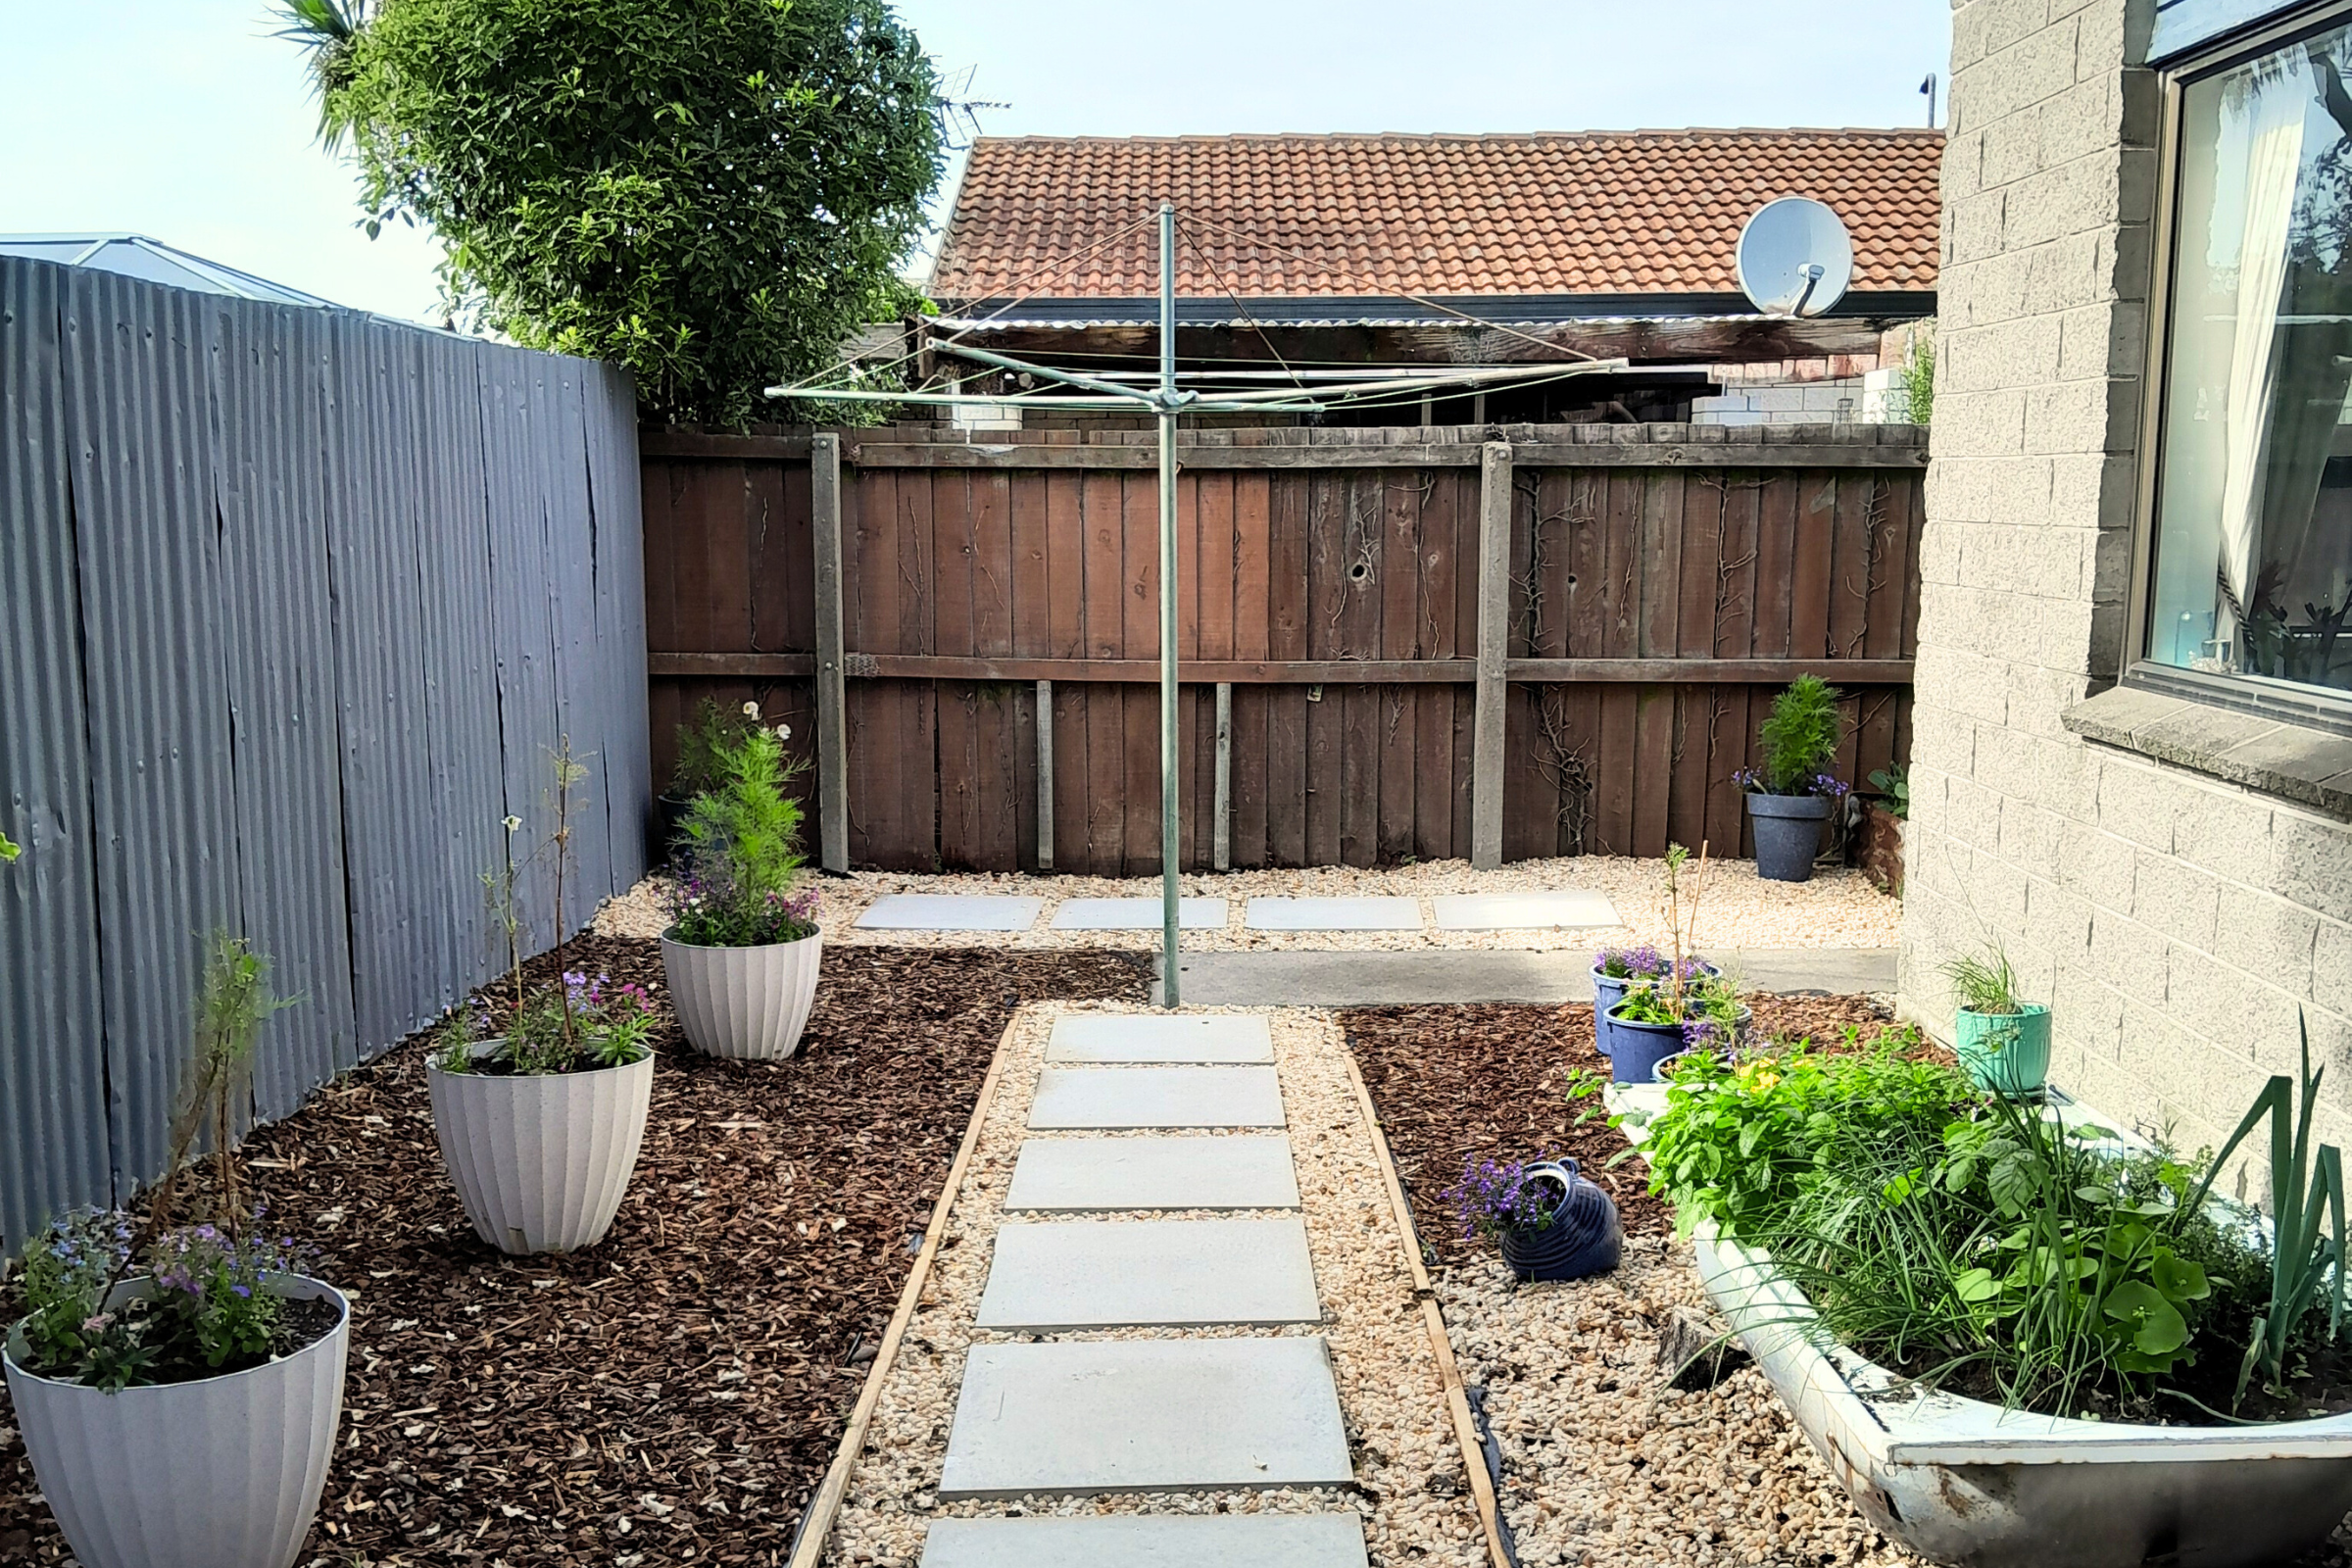
hat started as a simple patch of lawn quickly became an overgrown mess for this Christchurch household. Raised garden beds made mowing difficult, weeds took over, and the space became a significant source of frustration.
When Holly and her mum bought this character-filled home, it had everything they loved — high ceilings, exposed beams, and a classic villa-feel. But with busy lifestyles, they couldn’t give the garden as much care as it needed.
Over time, what was meant to be a practical space had turned into a constant reminder that something needed to change.
In this project story, we follow:
This landscaping transformation wasn’t just about paving a garden — it was about reclaiming space, simplifying maintenance, and creating an outdoor area they could truly enjoy.
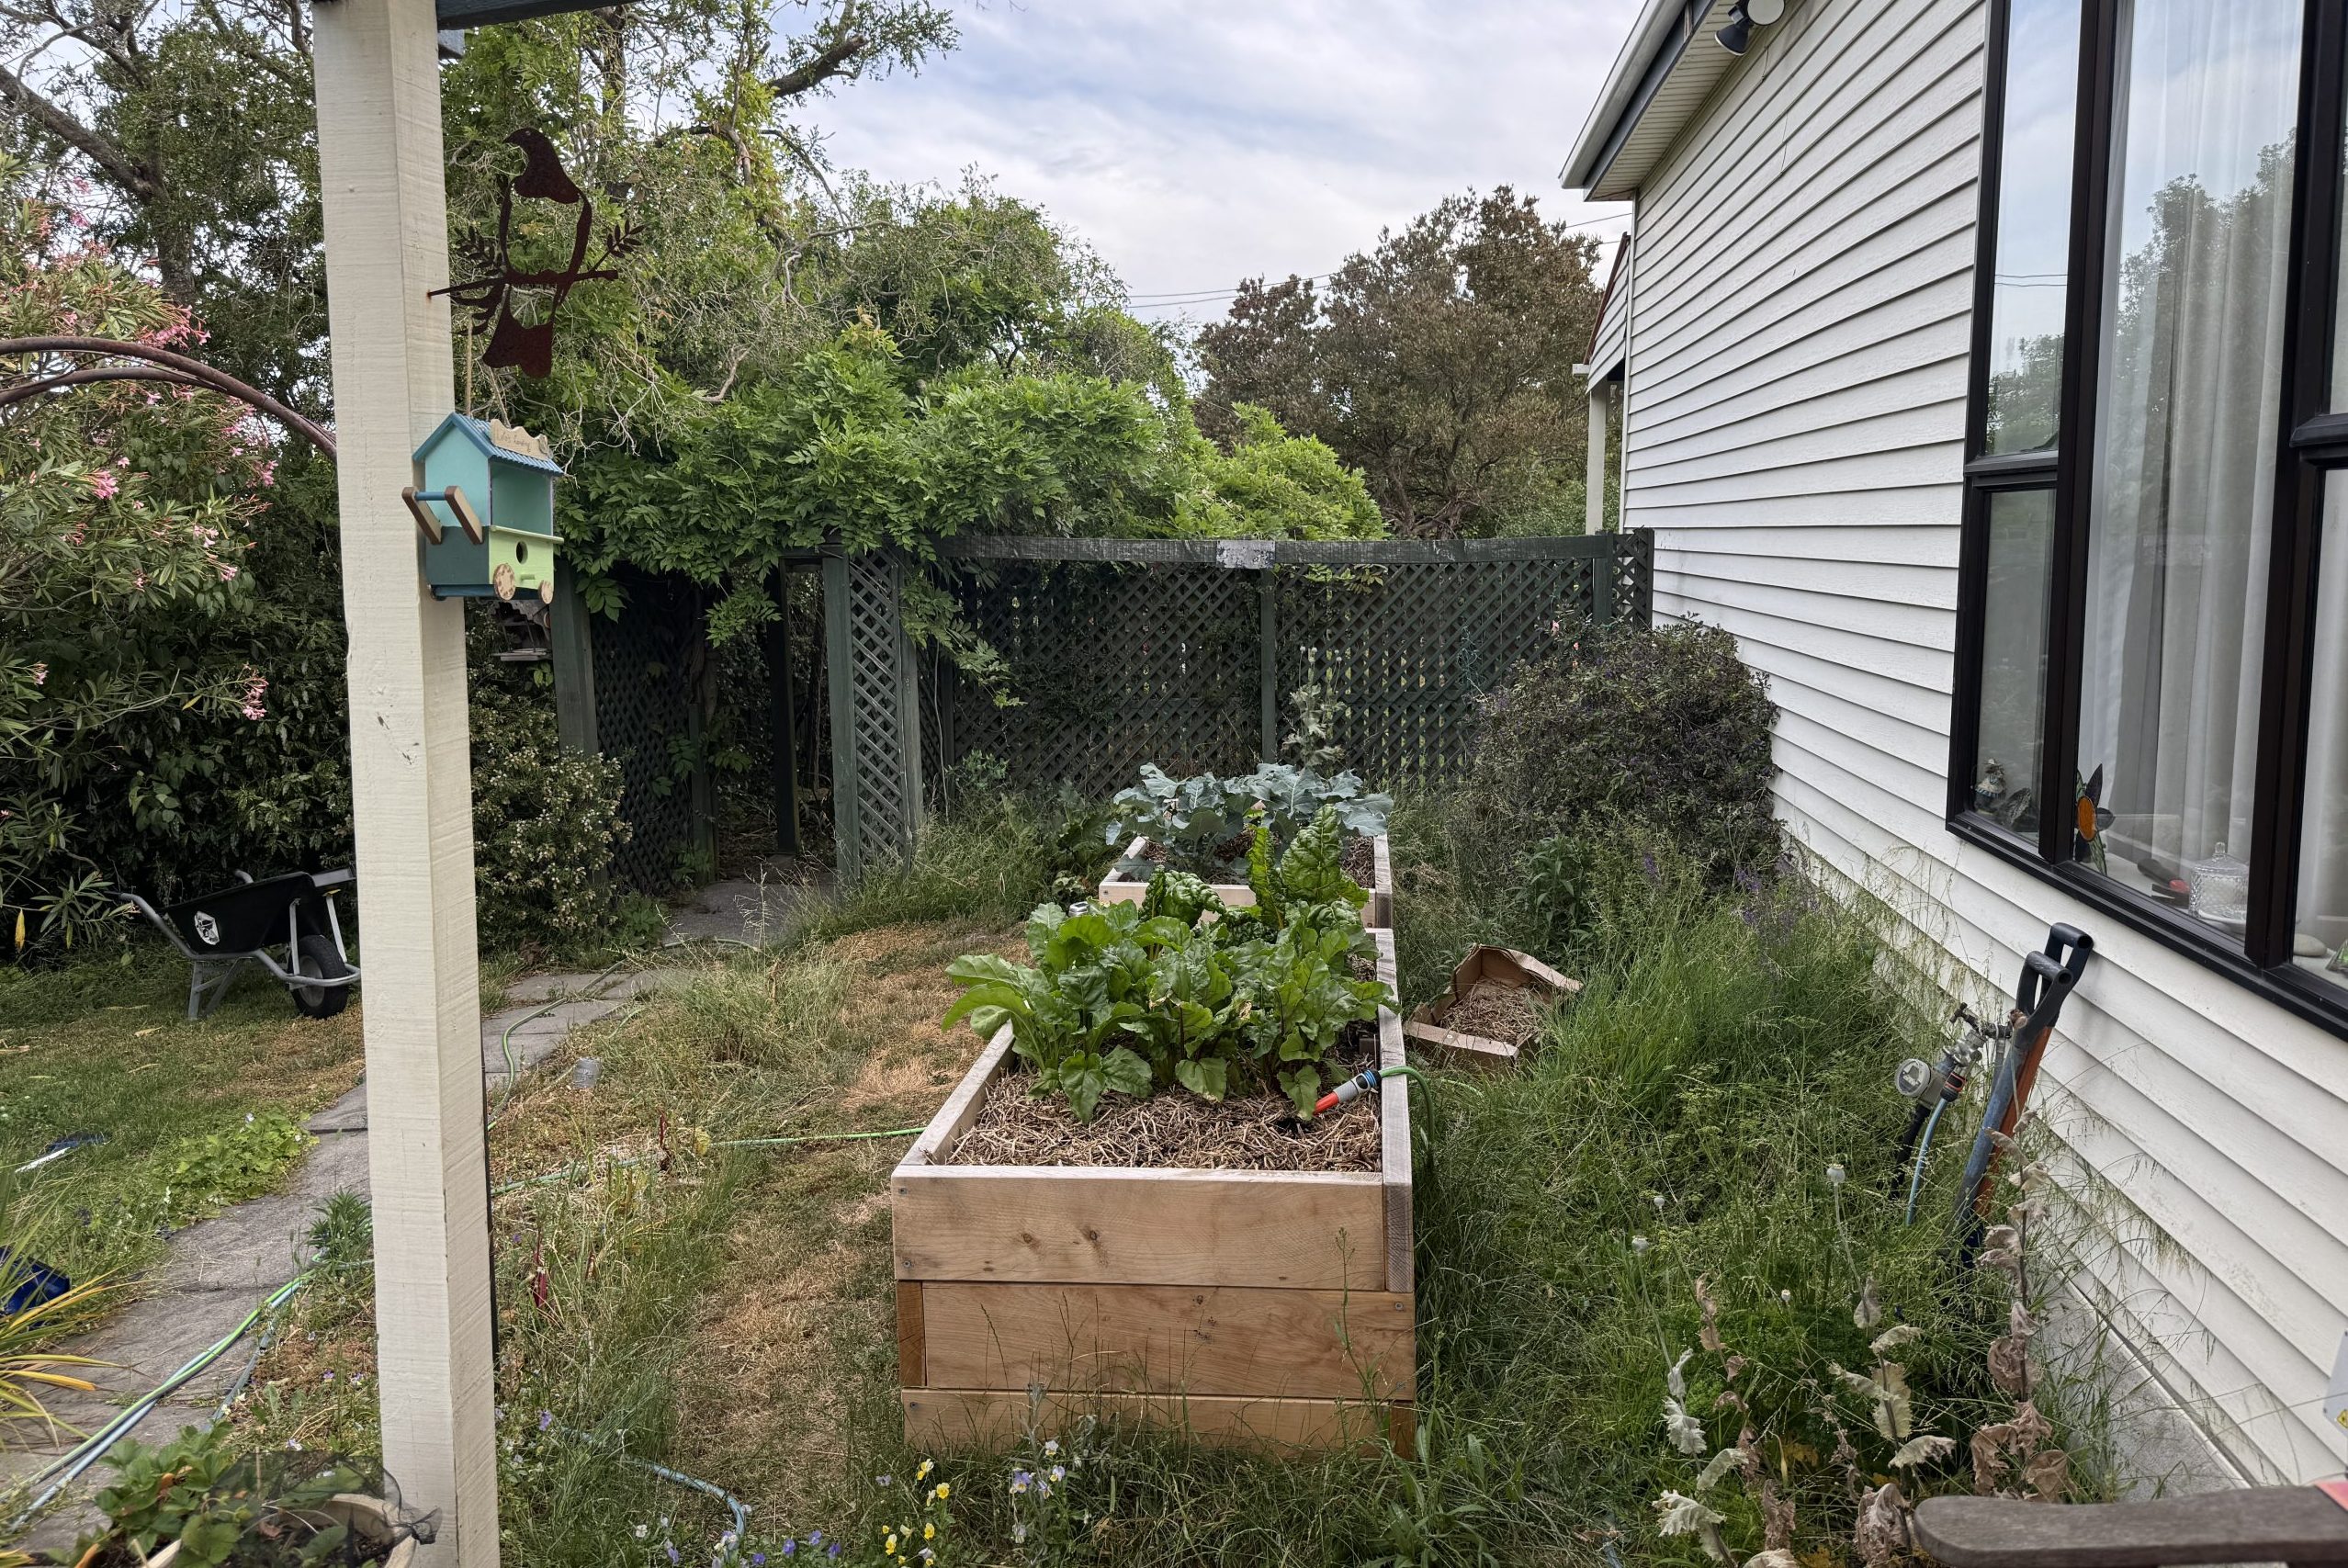
Before & after: Swipe to see the results.| Photos: Holly, Sam VK
When the garden became too much to handle
Before work began, the area played almost no role in their day-to-day life.
“It was honestly neglected,” Holly explains.
While the garden beds themselves were practical — higher, easier to maintain, and kinder on the knees — they created a new problem.
“We couldn’t mow around them properly, and it just ended up getting more and more overgrown,” Holly says.
The space had slowly turned into what she describes as a ‘wild jungle,’ with grass and weeds growing out of control.
That was the breaking point where Holly realised something had to change.

Neglected front yard space | Photos: Holly
From small fix to big vision
Initially, Holly’s vision was modest. With a busy lifestyle and a dog racing around the garden, the plan was simply to add some pavers around the garden beds to control the weeds and tidy things up.
“I can’t be in the garden enough,” Holly says, “so having something low-maintenance was key.”
But once she started researching paving options online — sizes, styles, colours, and layouts — the possibilities quickly expanded.
Holly began to see that removing unused garden space along the side of the house could unlock an entirely new area to enjoy.

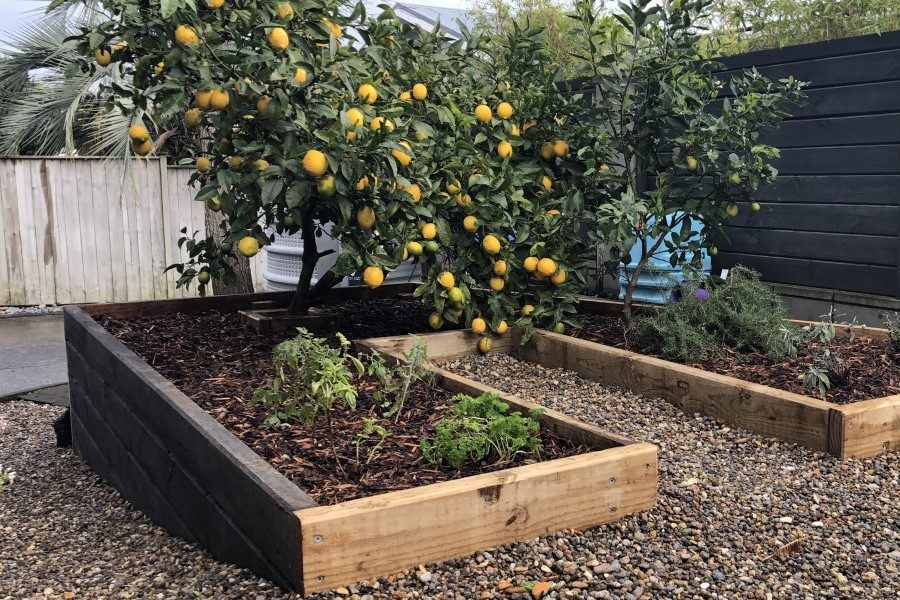
Overgrown space with 2 massive garden beds adding to the paving challenge.| Photo: Holly
Finding the right tradie for the job
Holly posted a job on Builderscrack and shortlisted two tradies whose profiles stood out, carefully reviewing photos of previous paving jobs and reading customer feedback.
“I wanted to get a couple of quotes to compare,” Holly says. “When you’re spending a decent amount of money, I think that’s a really good thing to do.”
While the quotes were close in price, the final decision came down to trust and communication.
Holly highlights regular updates, clear timelines, and straightforward conversations mattered more for her than chasing the cheapest option.
In the end, Banjo from Boundary Landscaping ticked all the boxes.

The work is underway with timber edging and compacted base. | Photo: Sam VK
The project breakdown
Banjo walked Holly through multiple options for materials, balancing cost-effectiveness with long-term quality. Together, they discussed finishes, maintenance, and how the space would be used in the future.
“He walked us through the different options and helped us decide,” Holly says. “When we compared everything, I kept coming back to how the finished space would look. We were sold on the idea of full paving.”
Once the decisions were locked in, Banjo handled the logistics end-to-end, from sourcing materials to managing timelines.
Project snapshot

Banjo from Boundary Landscaping.| Photo: Sam VK
Timeframes
The biggest thing in this project for Banjo was working around two large planter boxes already in place.
“Usually when I’m paving, I’d work from the house out,” Banjo explains. “But with planter boxes in the middle, it becomes a more abstract way of paving.”


Paving on the base and around the garden beds are coming together | Photo: Sam VK
A transformation worth every cent
Seeing the final result was an exciting moment for Holly.
“I’m so happy. Banjo did an amazing job,” Holly says.
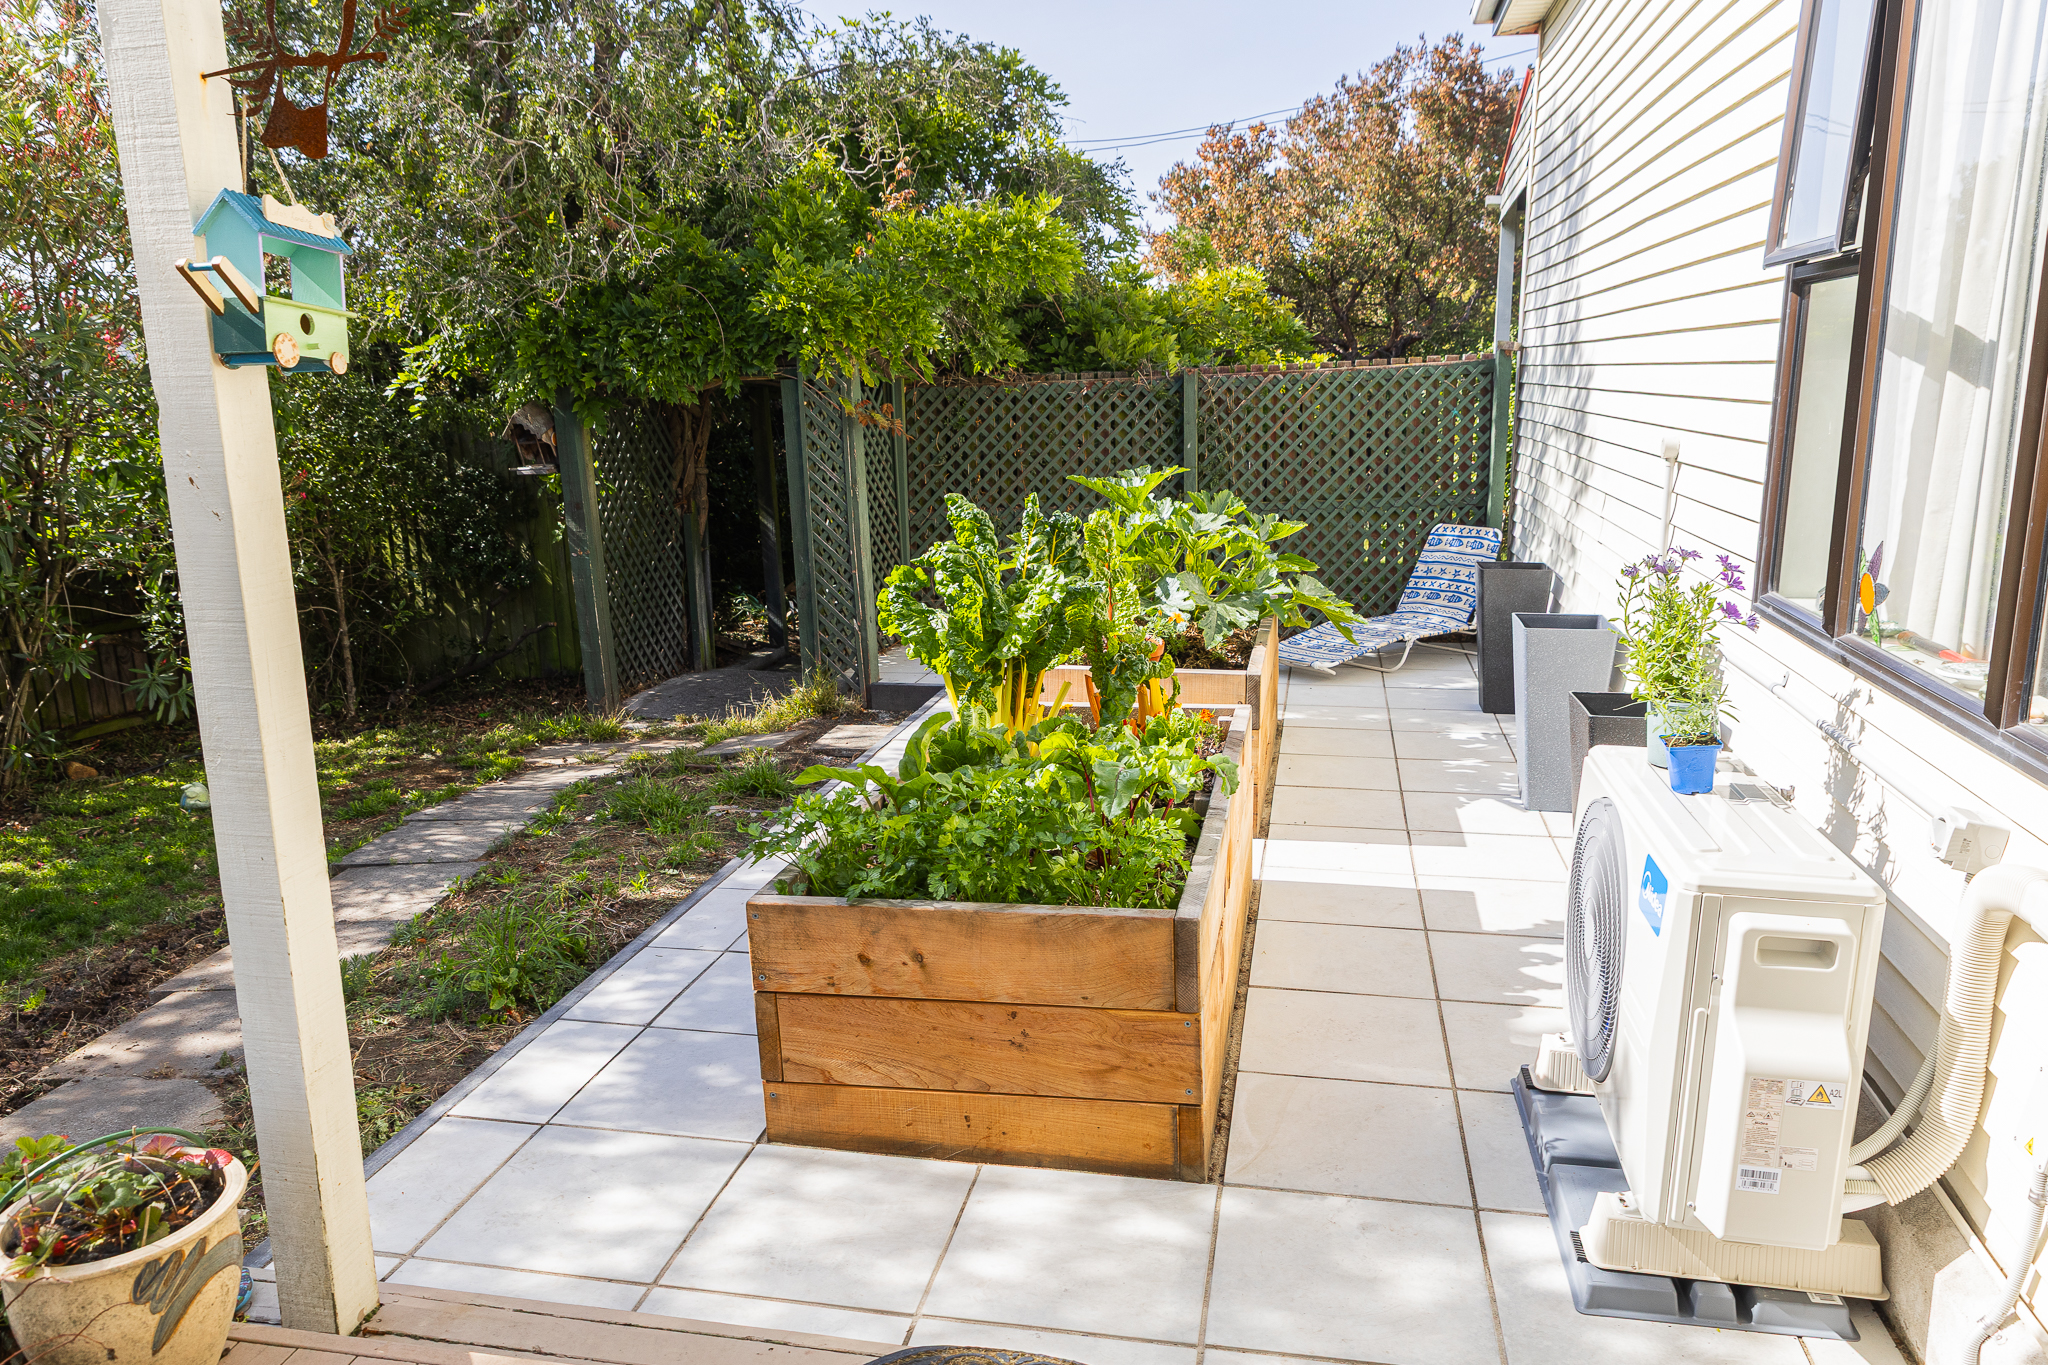
What was once overgrown and ignored is now tidy, clean, and inviting.
“It wasn’t an easy one,” Holly says. “Normally you’d be paving a clear area, but Banjo had to work around two massive garden beds. There was a lot of digging and cutting involved and he absolutely nailed it!”
The finishing touches made all the difference.
“We love the end look with the sealant too. It basically looks like a grout for the paving with a sandy color that contrasts beautifully with the pavers,” Holly explains.

Beautiful low-maintenance paving transformation at last! | Photo: Sam VK
More importantly, how the space is finally being used
“We had some people come over and see it and they were just amazed by how much it changed,” Holly adds.
“Now that we’ve gained extra space at the end of the garden, I would love to have a BBQ set up with some outdoor furniture so that we can host,” Holly says.
Holly’s mum was equally impressed, amazed by how dramatically the space had changed.
While the final cost came in slightly higher than originally expected, the value was clear.
“It’s worth every penny,” Holly says.
“I feel excited, inspired — it makes me want to do even more landscaping in the garden and do more improvements,” Holly adds. “It’s tidy, clean, and yeah I just love it.”


This space are now used for sun lounge with more plants going to be added. | Photo: Sam VK
Advice from Banjo: How to get a good paving result
For Banjo, preparation is where good paving starts.
Before any digging begins, Banjo focuses on getting the site tidy, tools organised, and materials delivered.
“I like starting a job with a clean and tidy area,” Banjo says. “I make sure everything is ready to go before I start excavating. That sets the rhythm for the whole job.”
When it comes to materials, Banjo stresses that what’s underneath the pavers matters just as much as what you see on top.
For this project, he used a compacted base with crusher dust, topped with 500 x 500 smooth natural pavers. The joints were finished with an adhesive sand, which allows for slight movement and helps prevent cracking over time.
“With crusher dust, you want a joiner that allows movement of the pavers,” Banjo explains. “That’s what helps the paving last.”


Close ups of natural pave material and adhesive sand as jointer. | Photo: Sam VK
Advice from Banjo: What homeowners should know before paving
For homeowners planning a similar project, Banjo’s advice starts before the first site visit.
While photos are useful, Banjo still recommends an on-site visit to properly assess complexity, levels, and drainage.
Finally, Banjo reminds homeowners to think long-term. Proper base depth, good drainage away from the house, and quality installation all play a role in how paving performs over time.


Paving around 2 garden beds. | Photos: Sam VK
Advice from Holly: What she learned along the way
For Holly, quality was always the priority. Rather than chasing the cheapest option, she focused on choosing a solution that would stand the test of time and reduce future maintenance. With paving done properly, she knew the space would largely look after itself.
That mindset also shaped how she felt about the final cost. While the project came in slightly higher than she initially expected, Holly says her expectations shifted as she learned more about what was involved.
“We’re not tradies, so you don’t really know what to expect cost-wise,” Holly explains.
“But once you see the work that goes into it, the digging, the base preparation, the layers, the sealing, it’s absolutely worth every penny.”
Posting a job and getting multiple quotes, especially for a big project like this, helped her feel confident that she was making the right decision.
“It’s always good to have something to compare,” Holly says
Cinematic shots | Videos: Sam VK, Holly
Advice from Holly: What she would do differently
Looking back, there’s one thing she would approach differently. If she had her time again, Holly says she would plan the paving before installing the garden beds.
“Once the garden beds are full, they’re really heavy and not going anywhere,” she explains. “One of them isn’t perfectly level — it’s not a big issue, but it’s something I notice.”
That said, Holly is quick to acknowledge how well Banjo worked around the challenge. Despite the constraints, the paving itself is level and finished to a high standard, and the overall result still exceeded her expectations.
Holly’s biggest piece of advice is to take time to explore your options before committing, and to do your due diligence, so that you too can have a great experience.
“Ask about different options, colorway, explore the materials yourself and just make an informed decision by yourself.”
")
Willow is enjoying her new space | Photo: Sam VK
Bringing it all together
What was once an overgrown and frustrating garden is now a bright, low-maintenance space that Holly and her mum actually use and enjoy.
By taking their time, exploring their options, and prioritising quality over quick fixes, they were able to create an outdoor area that fits their lifestyle.
With clear communication and quality workmanship, Banjo helped turn a challenging space into a lasting result. It’s a reminder that with good planning and the right tradie, even neglected gardens can become functional, welcoming spaces built to last.

Willow is enjoying her new space | Photo: Sam VK
Thanks from BC
A big thank you to Holly and her mum for sharing their landscaping project.
And another big thank you to Banjo from Boundary Landscaping for sharing your time and expertise.